Waistbands. 

In the last couple years I have changed my method for sewing waistbands. The old method has been basically following directions which usually consisted of sewing on the waistband, turning the inside seam allowances under, and top stitching. Sounds easy enough but often to get that topstitching to match perfectly on both sides was an irritating challenge. That is if you like things perfect. I think I am in that category. I have become much more free in my sewing, making my garments with my way of doing things.I don’t worry about the instructions and make it my own. Some people do this naturally. Some people drive themselves crazy by trying to follow someone else’s instructions. I used to always follow the rules. But not anymore.

This is one way to do it.

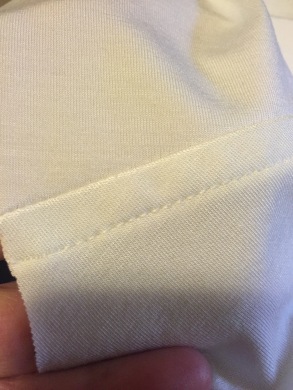
Sew the waistband lining to the waistband . Trim or grade seam. Edge stitch using #10D foot.

{Wowza, look at those matching seams}

This is where your options begin. For this post, I will be using the serger method.

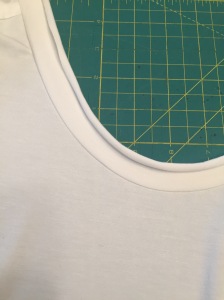
The fastest way to finish your seams is to use your serger with a 3-thread overlock stitch with a short stitch length. Like a 1 or even less. The width is pretty wide. Maybe a 7.5. There are no rules. Make this your own.


Isn’t that pretty?

Then you can add your label before you attach the bottom of you want.

For this pair I stitched a tight 3-thread zig zag (#7).


You can also stitch your label on after everything is attached. Sometimes it is fun to use a contrasting thread on the outside like this:


img_9770-1img_9769-1


After attaching your label, stitch the short ends of the waistband (leave the lower edge free). Then, on the lower edge, fold it under on each end to where you think is appropriate spot. (Perhaps it could be folded under for the entire width of a front pocket, wherever it looks nice). Pin the entire waistband.

For this pair the pants, the waistband was stitched in the ditch from one end to the other. This pair has a contrasting lining. I put matching thread in the bobbin for the lining.

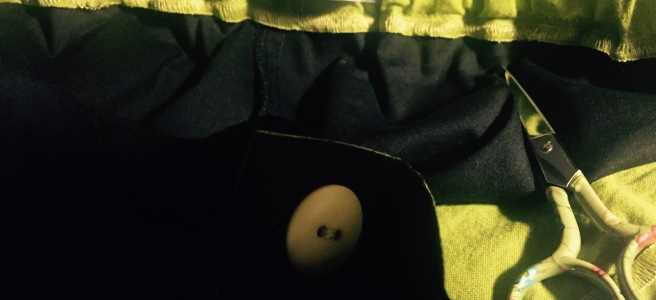
The inside looks like this (there is elastic inside):

I think they look great. Much better than sloppy topstitching. 😱


Perfect!

Vogue 9057- view C

Who can’t use another off-white summer top? Ok, maybe it’s just me, I never get enough of simple white tops.

I made this with bamboo lycra cream colored fabric. It was pretty slippery to work with. The edges also curled quite a bit. So I changed my original plan of making it mostly with my sewing machine and I used my fancy smanchy serger.

The alteration I made to the pattern was for slightly sloped shoulders. If you have shirts that do this:


You need a sloped shoulder adjustment. I thought I needed a FBA (full bust adjustment). So after a few attempts at a larger size, a FBA, a different FBA, I finally did enough research to find out what it was from.

There are different ways to fix it. I did Nancy Ziemans pivot and slide technique. But now I have found Linda Lee’s PDF that does basically the same thing and I think it’s easier.

Here is a link that shows several shoulder adjustments from Linda Lee with The Sewing Workshop. http://sewingworkshop.com/files/Fitting_Shoulders-April.pdf

View C is a good one. The method for the neck and shoulder is not the typical bindings that most knit shirts use. You use bands instead of binding. A different technique and the instructions are easy. Marcy Tilton is the designer and she usually gives directions for using a sewing machine. Marcy Tilton is one of my favorite designers and also sells fabric, very nice fabric. I found her at the Sew Expo in Puyallup, Washington and I have been buying her fabric ever since. She and her sister are from Oregon.

My fabric was cut and ready to go. Because the edges curled so much I decided to serge the sides, and hem with a narrow 3-thread overcast stitch.

I decided to use my BabyLock Ovation and stitch with the chain stitch. This fabric felt like it would get eaten up with a regular sewing machine.

The first seam is one shoulder seam with a 3/8″ top-stitch. img_9432

Now for the neck binding. I have stay-stitched the neck and armholes.

The binding was cut with a rotary blade and my quilting rulers because making it very precise with nicely trimmed edges is the best way for this shirt. The raw edge will show on the inside.

Sew the binding on with a 5/8″ seam, stretching it enough so that it lays nicely. Too much the shirt will bag, too little the binding will not lay nicely on the skin. This is a learned process and also can change depending on the stretch of the fabric.

After attaching the binding (right sides together), steam or iron it nicely so it looks good like this.(see that darn curly edge!)

img_9433

If it looks good then sew the other shoulder seam along with the binding, matching that seam perfectly. Don’t forget to topstitch that seam like the other.

You need to trim the seam allowance to a perfect and precise 3/8″. The binding will fold over and cover the seam allowances.

Fold the binding to the inside,covering the 3/8″ seam allowance. Pin in the ditch on the right side.

I tried to sew with the chainstitch but I needed to use the sewing machine and my favorite foot. 10D to the rescue.

img_9436

Sew as close to the ditch as possible. You shouldn’t see the seam when you are finished.

Attach the armhole binding the same as the neck  unless you do it like me and then you need to sew the side seams with the chain stitch (matching the binding, which was already attached), then I decided to use the wide coverstitch on the side seams.

I love this look.

img_9449

Finish stitching in the ditch with both armholes.

Next is the hem. This fabric was not nice. I used the wide coverstitch and in order to make it look nice I put a stabilizer underneath and that worked like a charm. (I ended up using scraps of my Swedish tracing paper).

I also stitched the vent with the wide coverstitch.

img_9437

This photo also shows the stabilizer that is underneath as I start stitching the hem. Sometimes when starting to stitch a hem on knits,  it has trouble starting (sewing tiny stitches before it grabs the fabric well) but using a stabilizer really helps those first stitches and the first stitches are exactly the size you wanted. In this case I stitched a length of 3.

That’s the end of this little shirt. I like it!!  Questions?    Just ask me!!

img_9440img_9446

Cropped linen pants- part 3


I’ve ironed the serged edge under and I’m going to top stich the hem.

Sometimes I coverstitch. The last pair I used foot #38 (uneven foot) and stitched. But this time I’m just going to use 10D.


I ironed before stitching (of course) and I stitched on the wrong side. I used 3.5 for my stitch length. Perfect!
Mine are finished now. I ironed a crease on both sides. I still need to put my label on them and I haven’t stitched the elastic in place yet.

I like them!
Just so you can see the Eileen Fisher pair that I copied, here is a picture of those. They are not ironed and well worn. I hope my slate blue pair wears as well.

Cropped linen pants- part 2

My serger is set up for a 5 thread safety stitch. The first seams to stitch are the inner seams, front to back. Important to mark right side, wrong side including front and back. I use chalk and also a safety pin to  designate front piece. Beautiful stitch every time.
Then the crotch seam. I have already done a muslin with these pants so I know I don’t have to worry about fit. (Except for this weeks weight gain).

I now serge the waist and the hem, and also the left side where I will put the invisible zipper.
I have never read the directions on how to put a zipper in but this is how I do it. I think they tell you to iron the zipper but I don’t do that. Note that the zipper is upside down.
I like to leave part of the serged edge showing. The Bernina zipper foot #35 is amazing.

I usually have the needle one click to the left. You want to stitch about as close as you can to the teeth. You also need to fold the side of the teeth so they get up in that part of the foot.

So I stitch along until I get to the place I marked. Both sides of the pants need to be marked at the same spot. Stitch the other side from the bottom up starting at the same length.

Then it looks like this

but after you iron it, it looks like this:

Perfection!!!!

Serge the right side of the leg if you haven’t already , then I get my #4 zipper foot to start the seam on the zipper side. You have to start stitching at the bottom stitch from where you stitched the zipper.

I just stitch a couple inches and my small #4 zipper foot can get to that spot. Otherwise you’ll have a hole in your side seam.

Then serge from hem to the lower part of zipper as high as you can go. I iron my seams and I iron well. 😌

Then iron the serged part of the waistband down.


You are going to create your casing for the 1/4″ elastic now. Don’t measure your elastic, just cut it huge.

Of course I use #10D foot . I have folded the waist down by 3/8″.


Shimmy that safety pin in and bring it out the other side.

Now you can try your pants on and adjust the elastic to where you need it to be. You can either straight stitch on the ends, or use stitch #25 to tack it in place.We are almost finished!