The Perfect V-neck for a tee shirt

I’ve made plenty of V necklines and not always thrilled with the results.

I’ll show you the technique that works best for me.

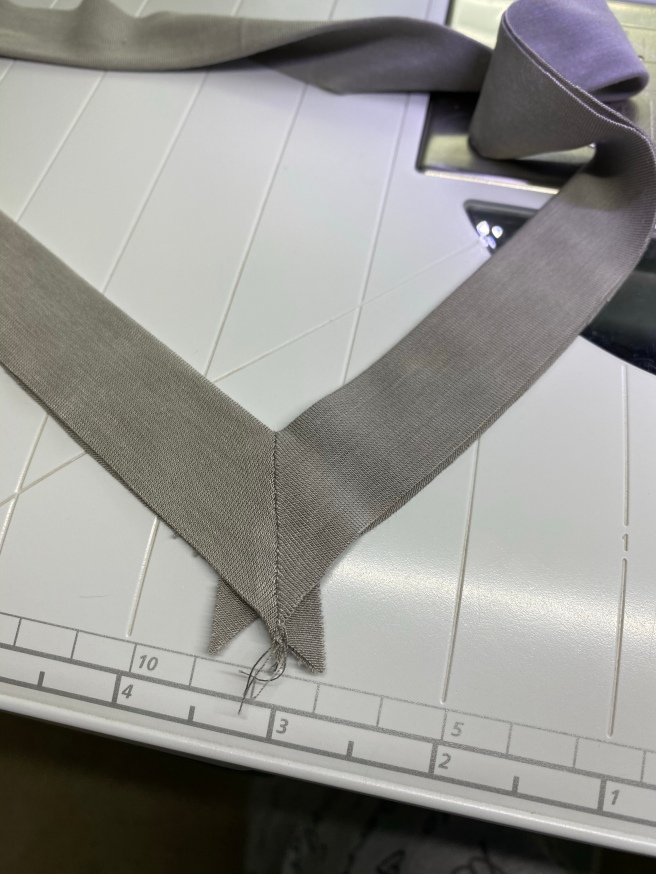
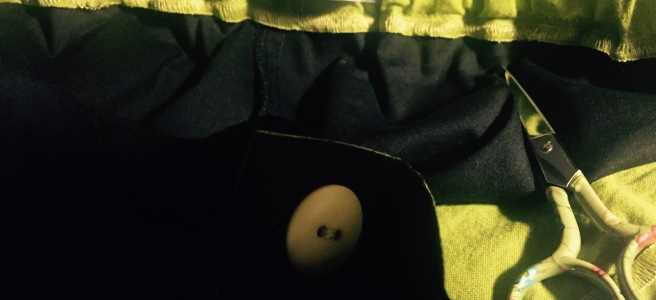
Your V neckband piece should look something like this:

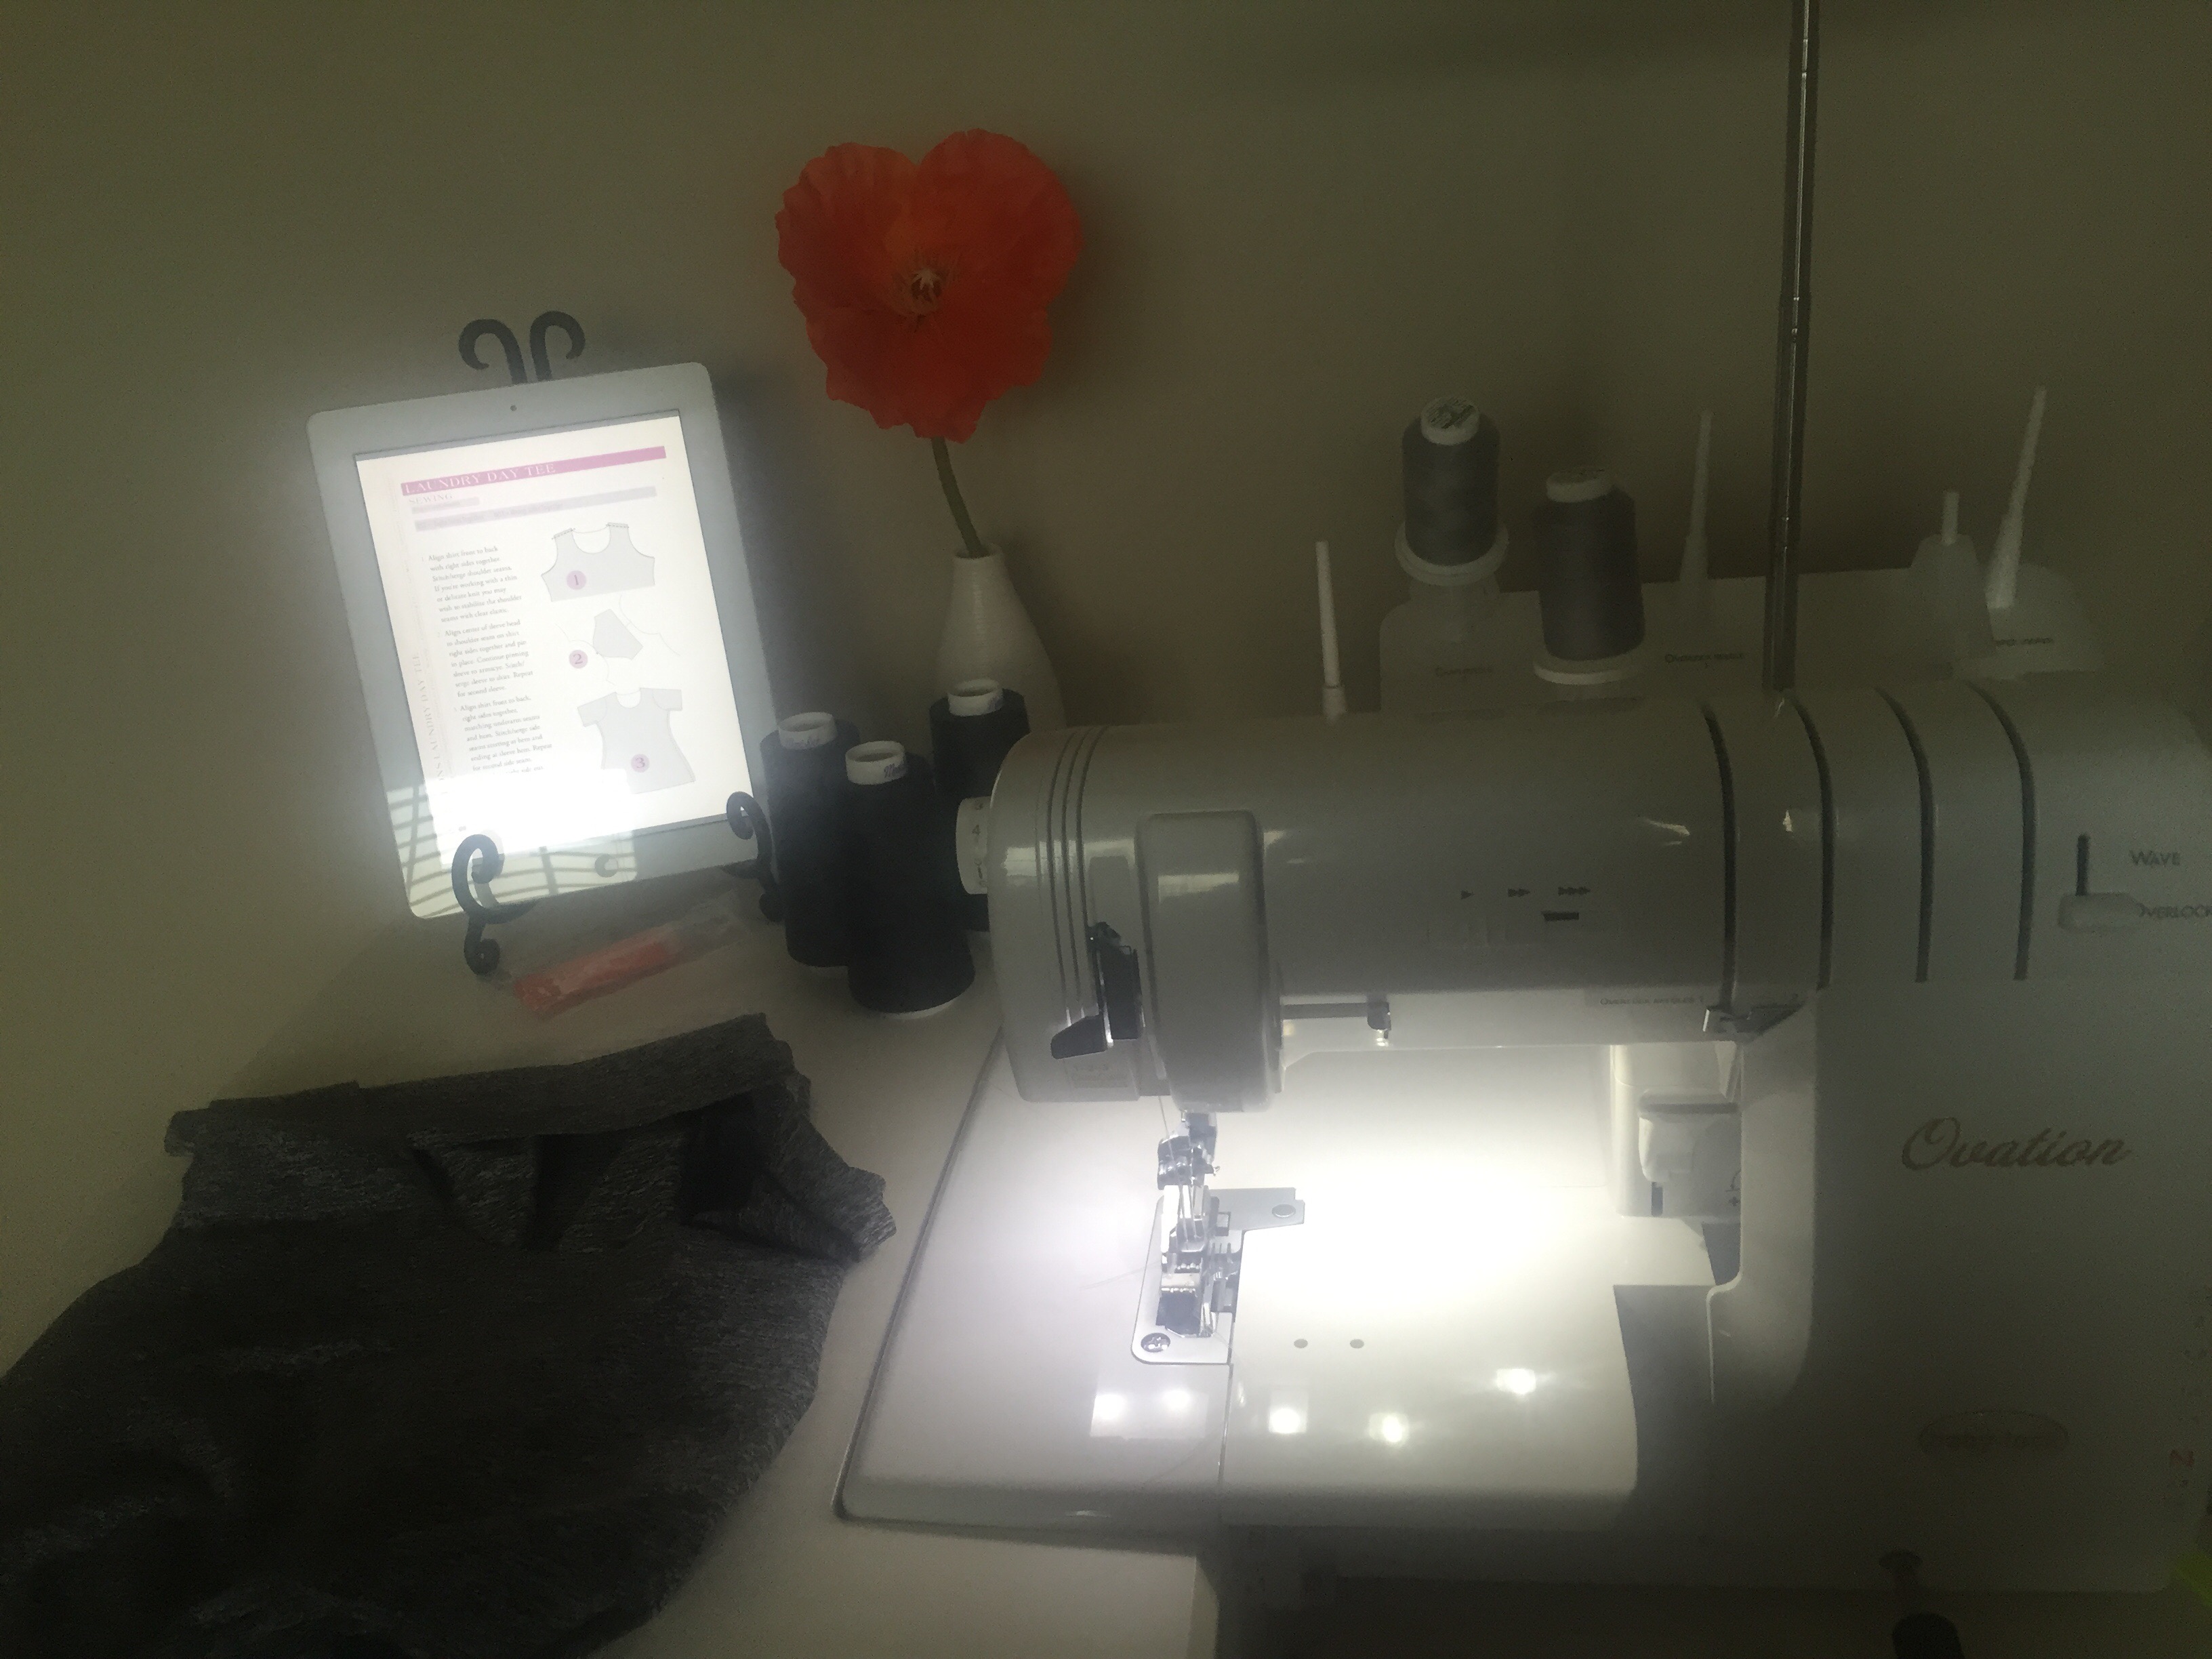
I will be using a combination of my regular sewing machine and a serger. But it can totally be done with just your regular sewing machine.

Sew the shoulder seams of your front and back pieces of the tee shirt. Press the serged seams to the back. Add the sleeves to the top and press towards sleeve. I am a big believer of a iron!

The next step will be sewing the right sides of that V neckband together with a 1/4″ seam. Press the seams flat and clip just before the stitches. Turn right sides out and press the band flat.

Change your stitch length to a 4 or your favorite basting stitch length.

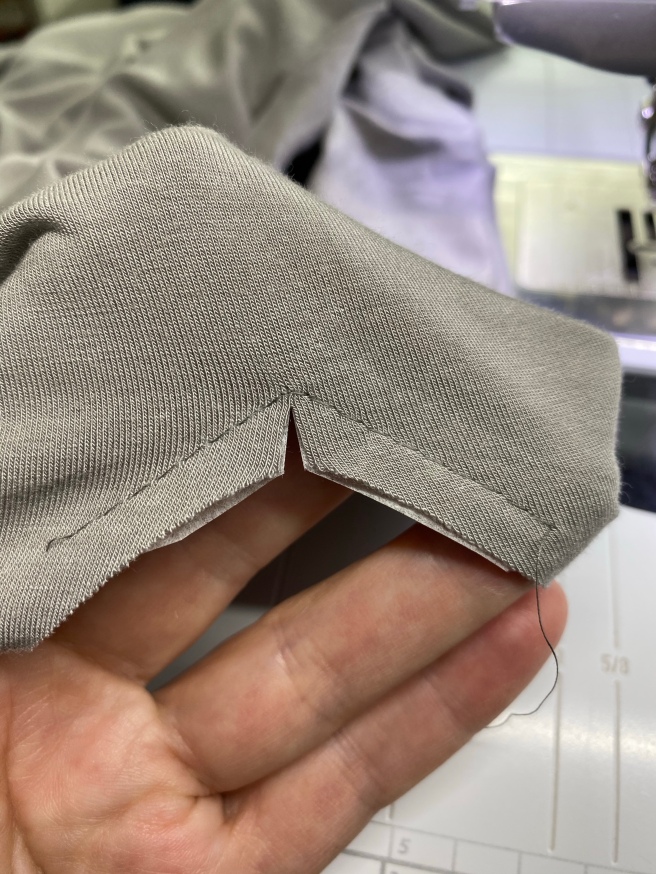
Baste on the front piece one inch before the V and turn and go up the other side another inch. The fabric here is a rayon spandex and very slippery so I added a piece of tear away stabilizer underneath.

Then clip just to the stitches.

Baste on the neckband too, one inch or so above and the other side of the V.

This looks like more than a inch, no big deal.

Then you are ready to start attaching this band to the body of your shirt!

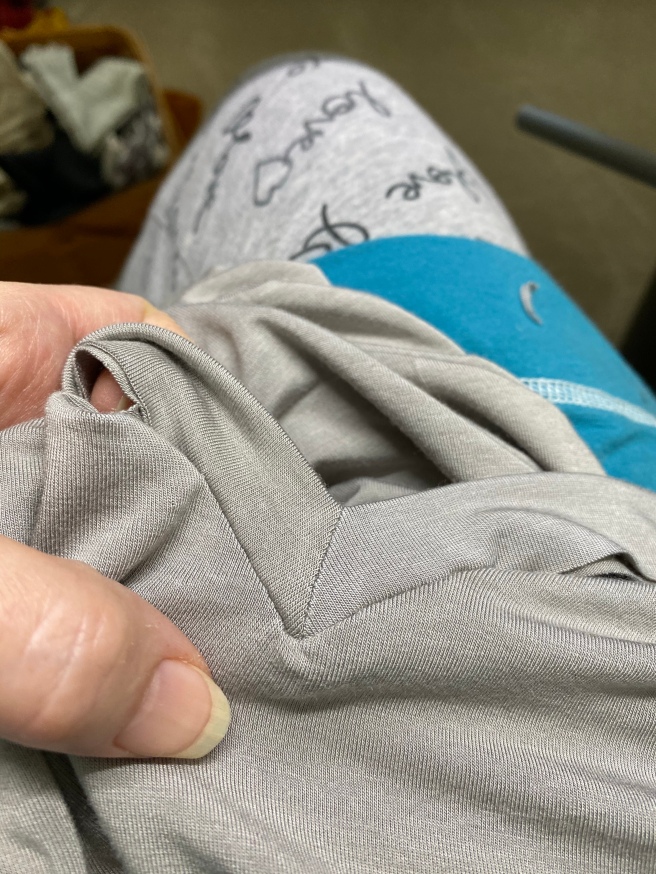
Stick a pin right where the V meets on the neck band and attach it right to V of the body of the tee.

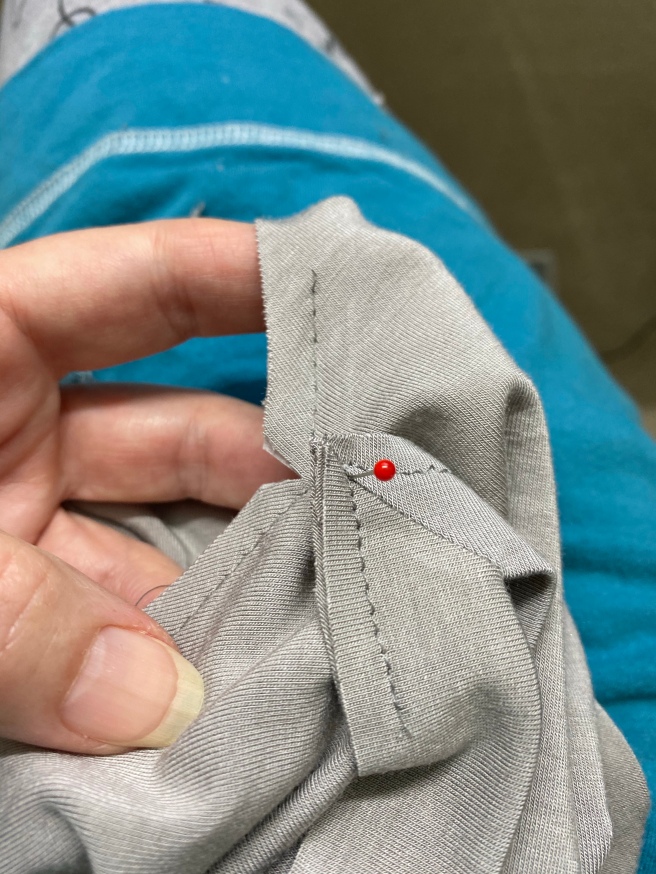
Turn this up to one side and sew just outside the basting stitch with your regular stitch length. You can either turn here and go up the other side or if you are afraid, backstitch and cut threads. And repeat for the other side!

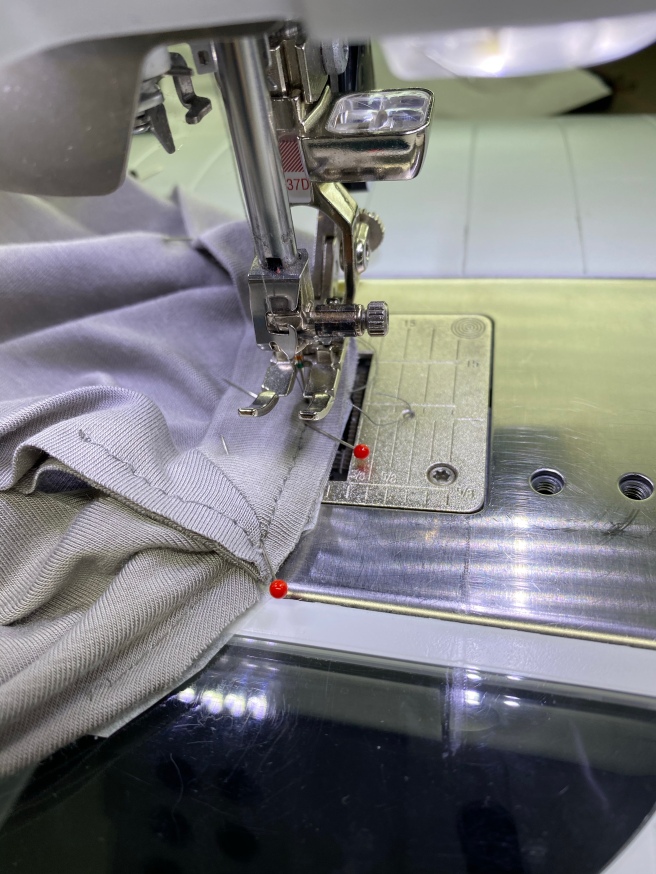
This pic is going up the other side.

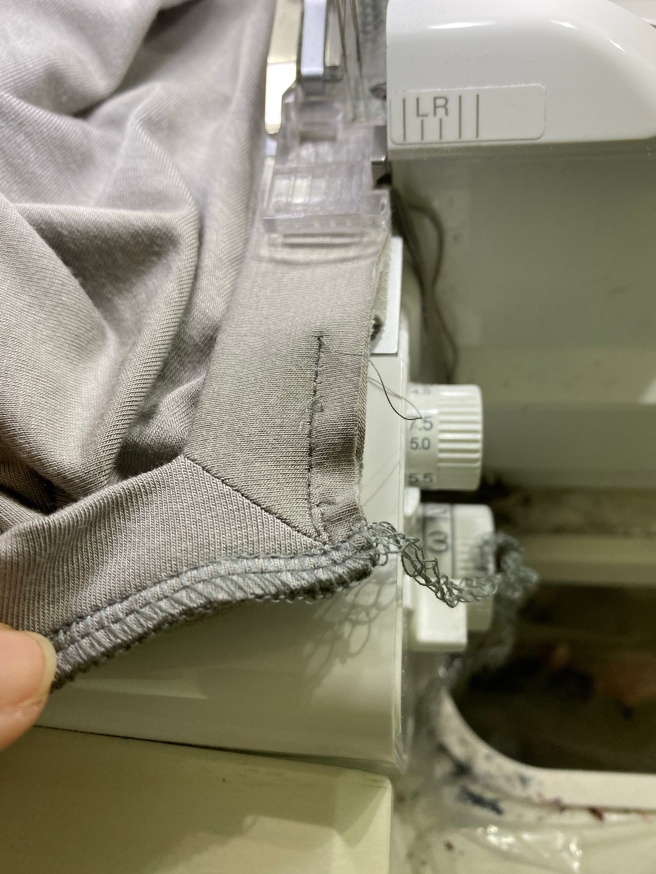
This is what the right side looks like now.

At this point I attach the rest of the band to the shirt. Find the middle of the back and the middle of the band and pin or clip.

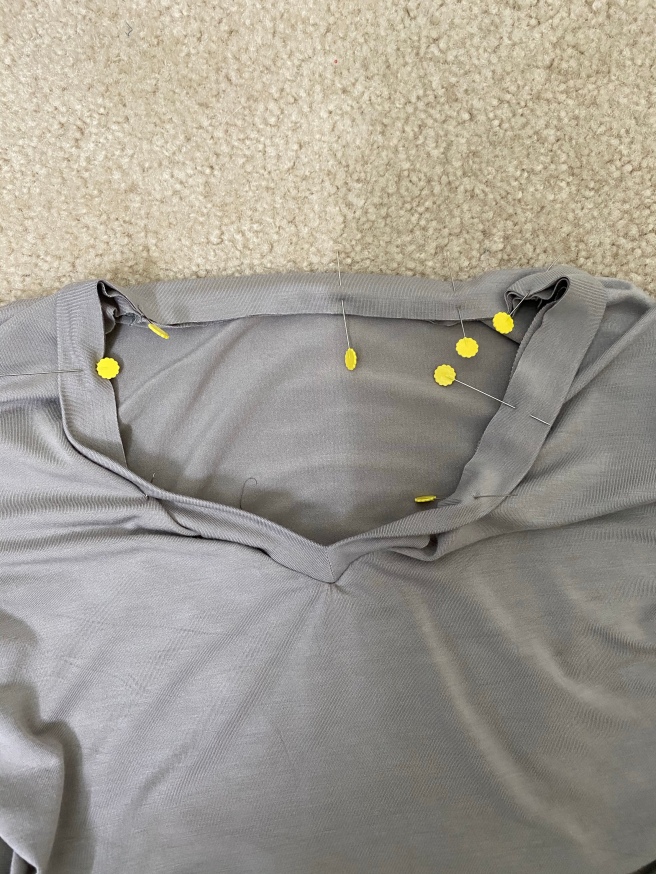
I usually use clips but here I pinned. Stretch the band as necessary but not the shirt.

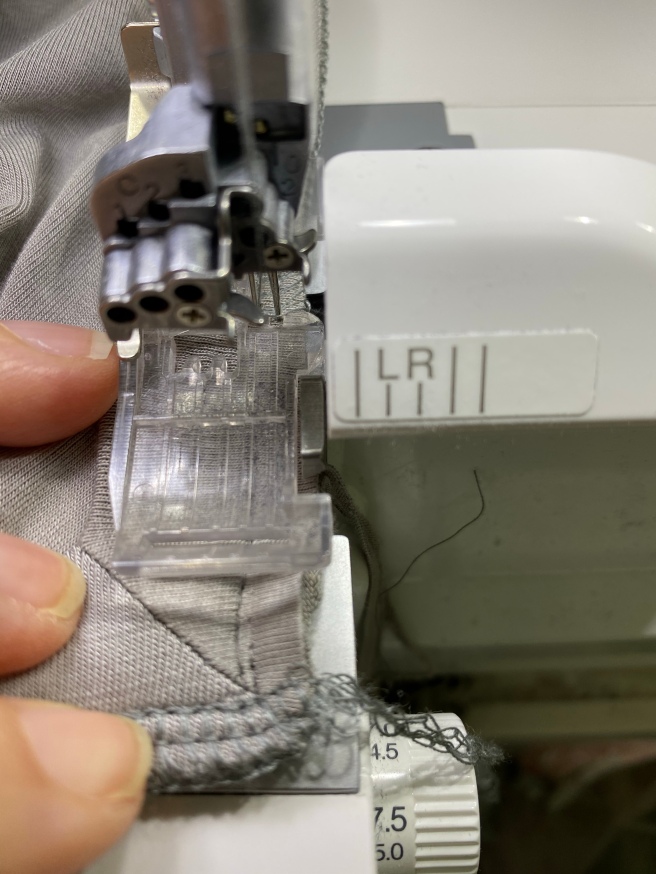
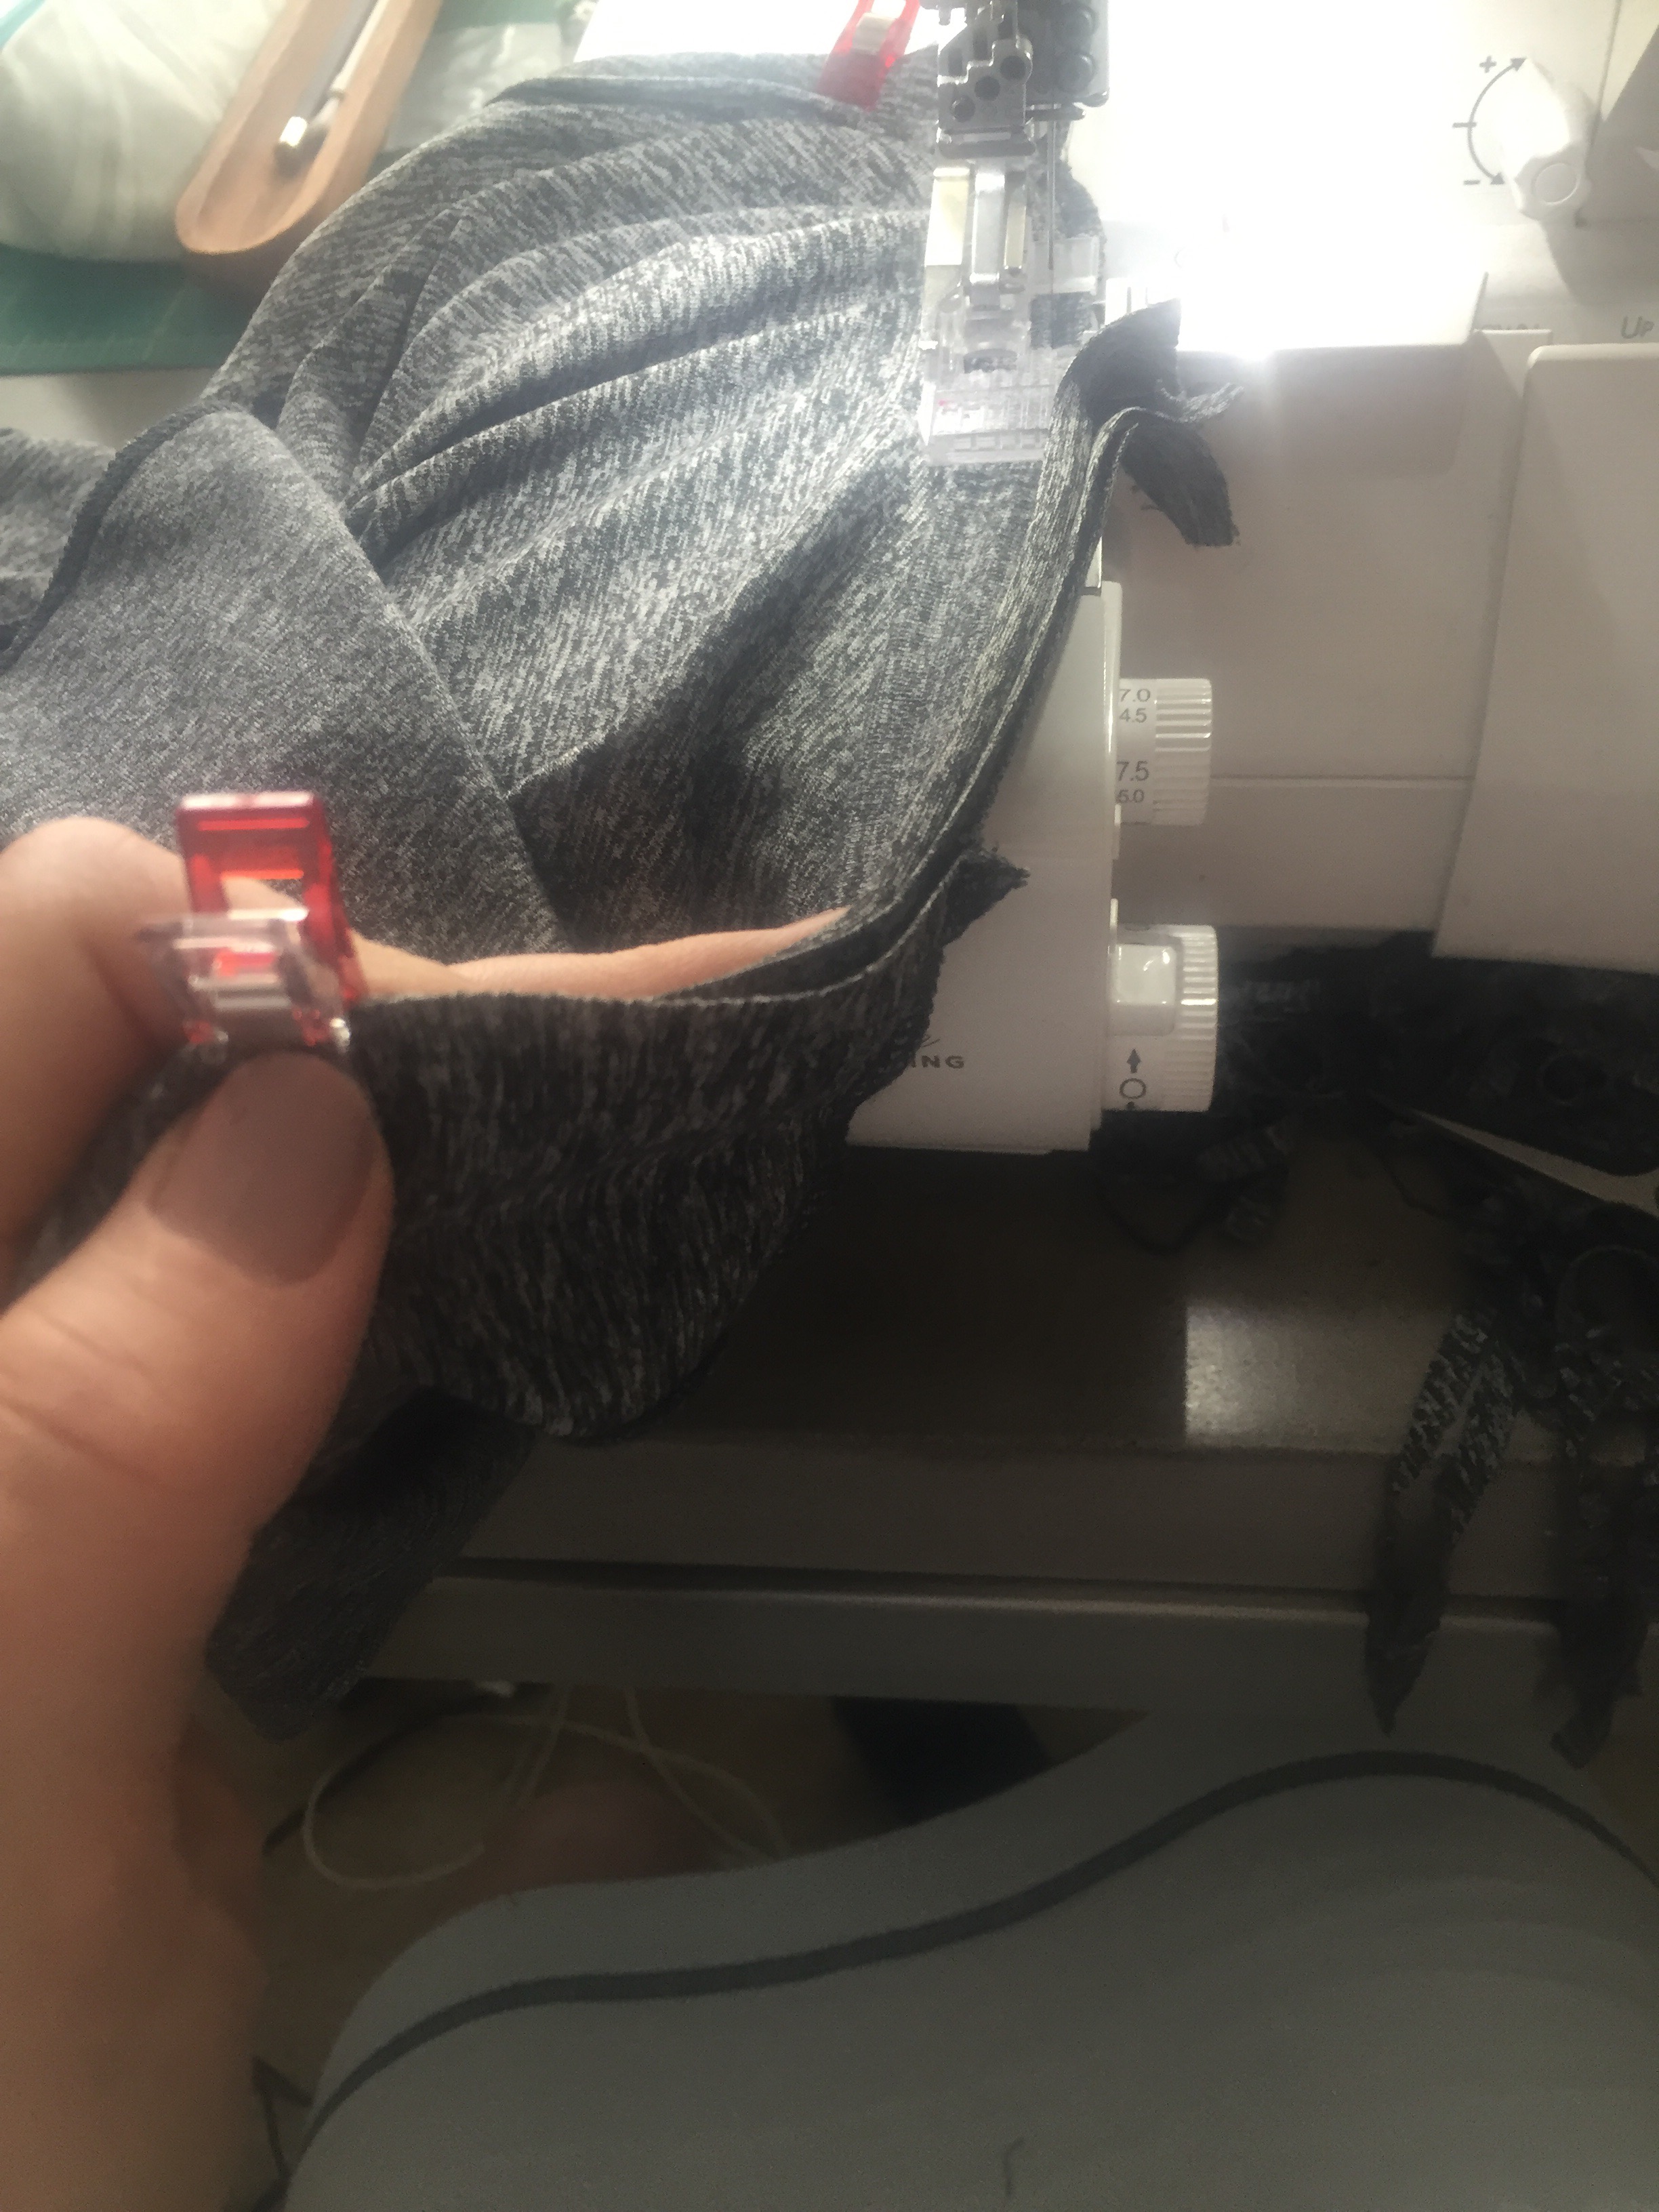
This is where I switch to the serger. I have it set for a 4 thread overlock.

Start at the bottom of the V. You want that left needle to be either right on that stitch line or just to the left of it. Serge all around the band. I did a 1/4″ seam.

Here I am coming to the end of the other side. Make sure you stitch to cover the previous stitches.

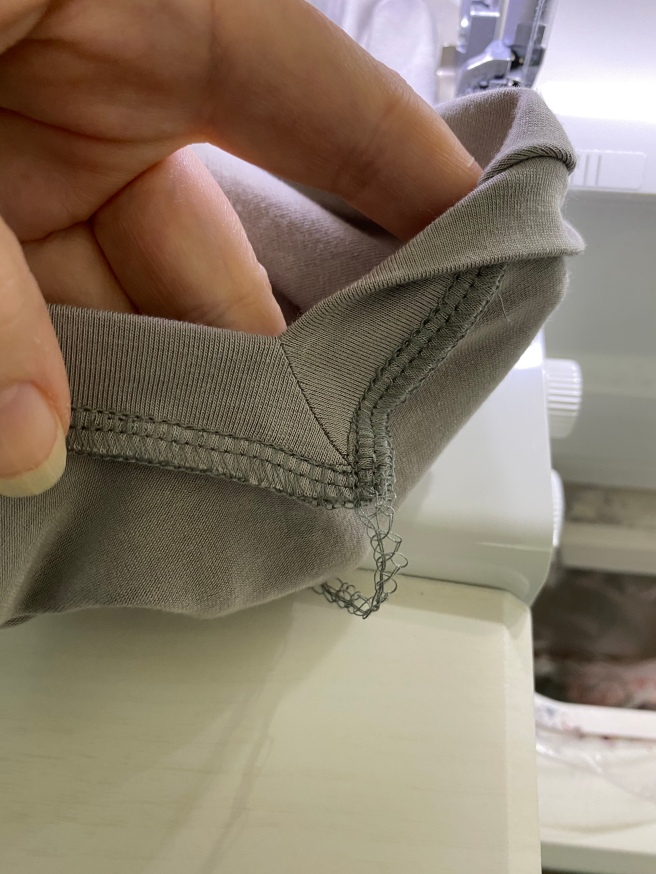
Looks like I missed covering those stitches, I just removed them afterwards. No big deal.

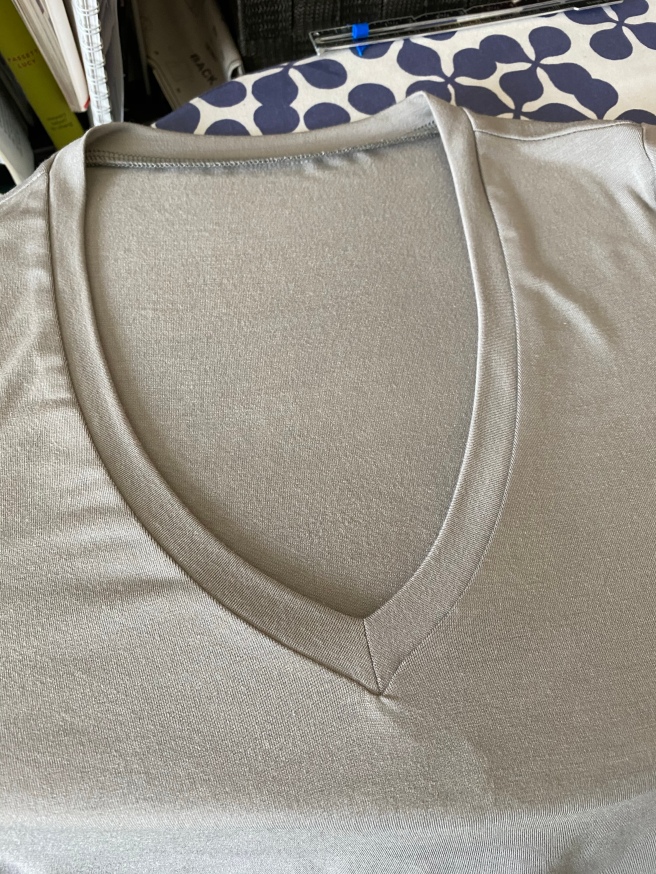
Turn and press. Usually I will use my coverstitch to topstitch but this fabric was not making me happy, so I just didn’t do it.

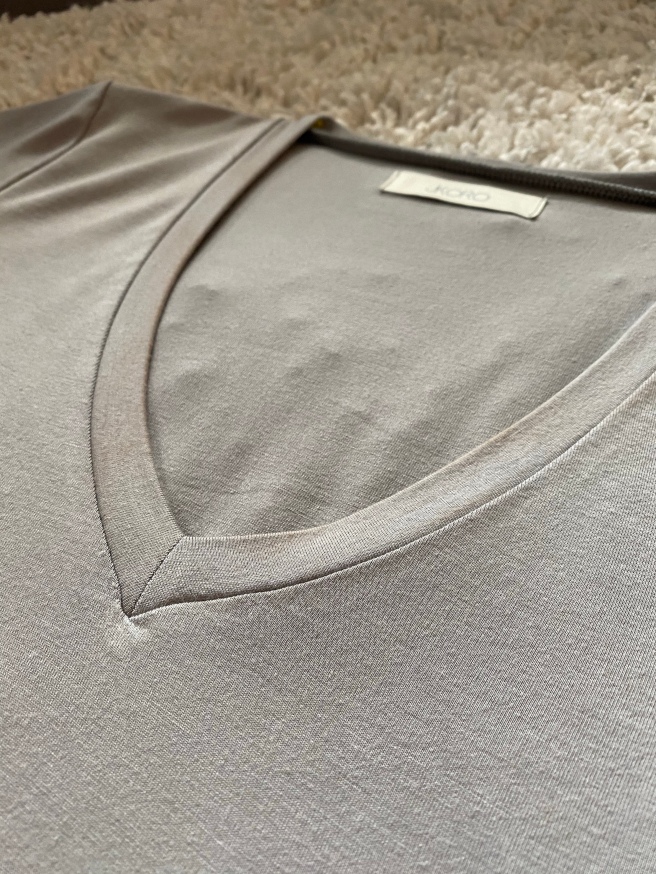
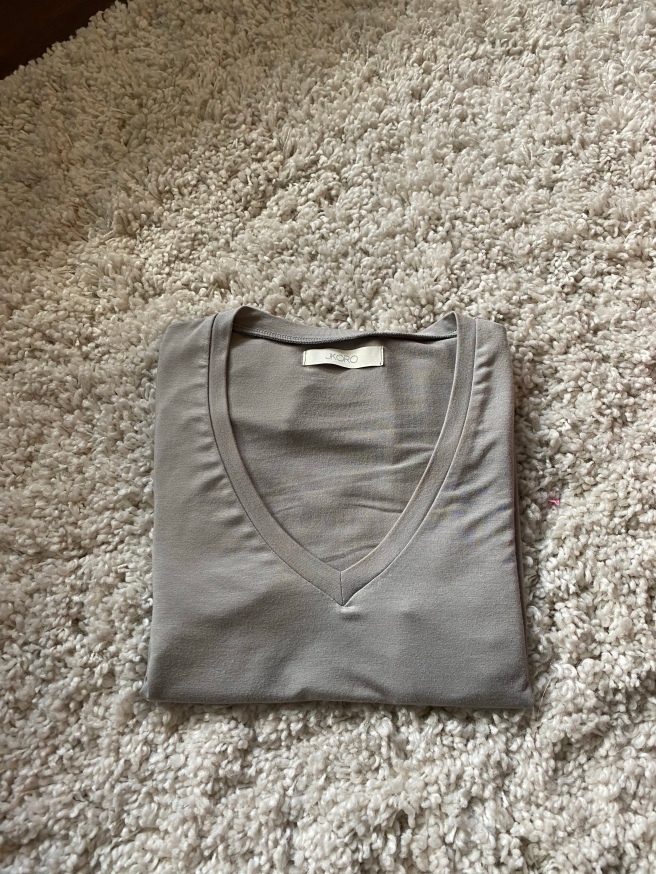
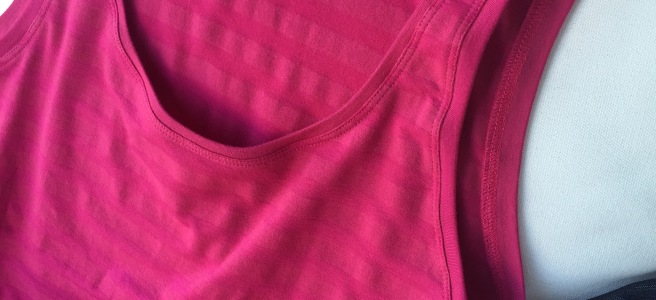
It’s really quite perfect!

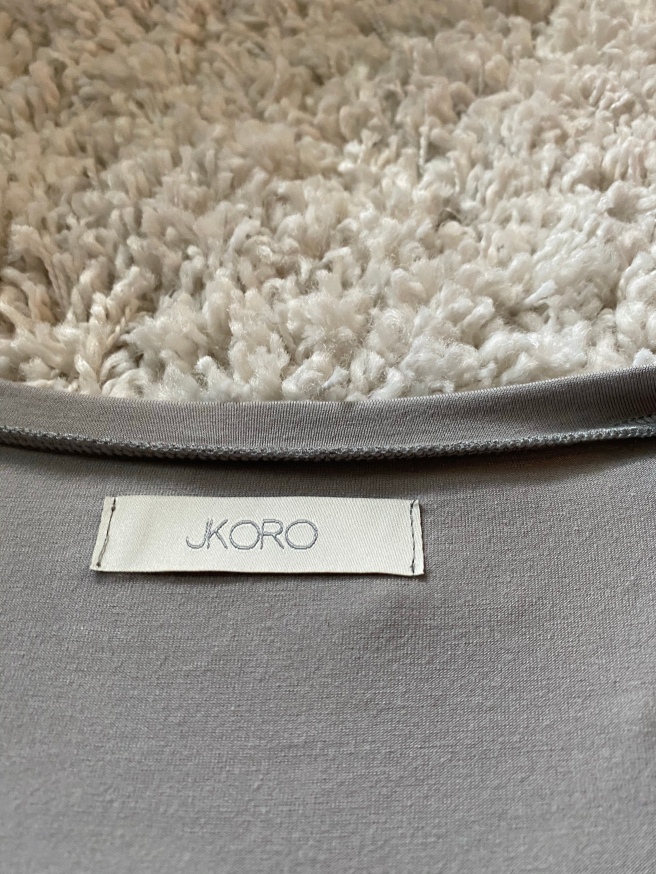
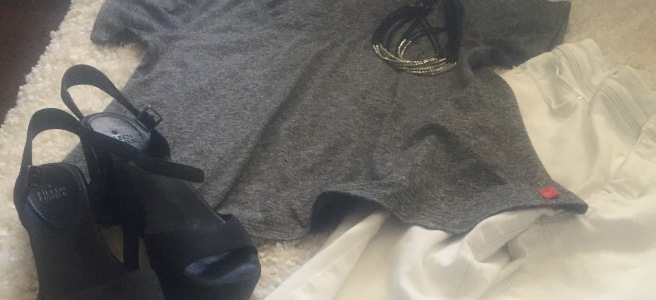
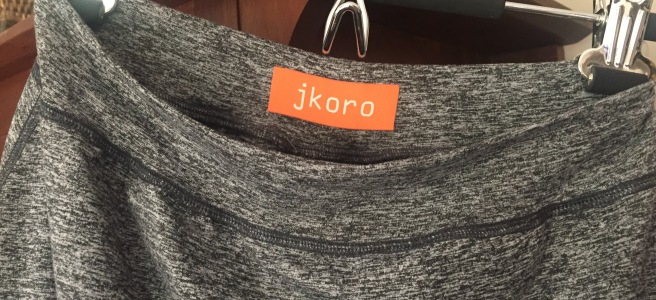
Must never forget at least one label.

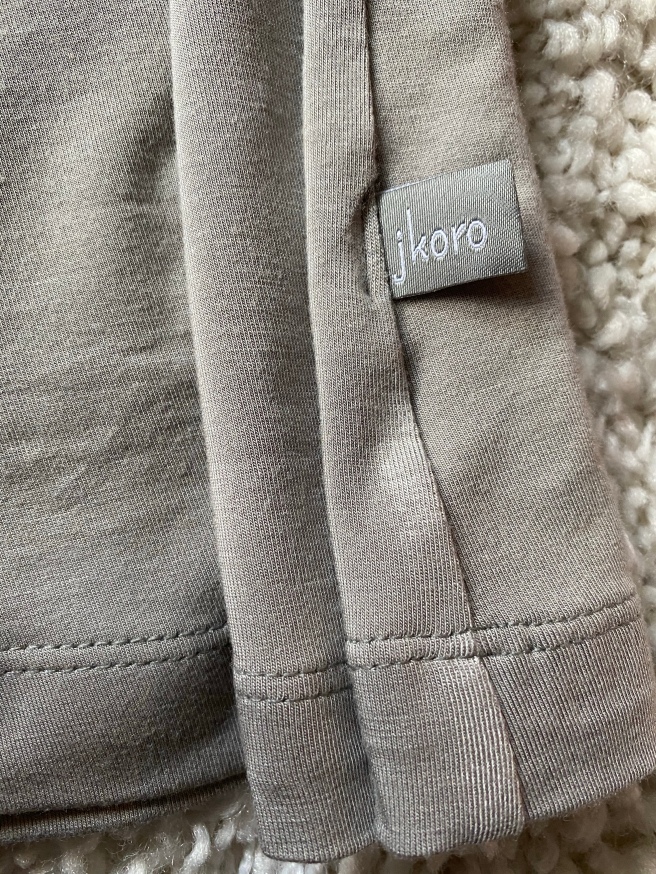
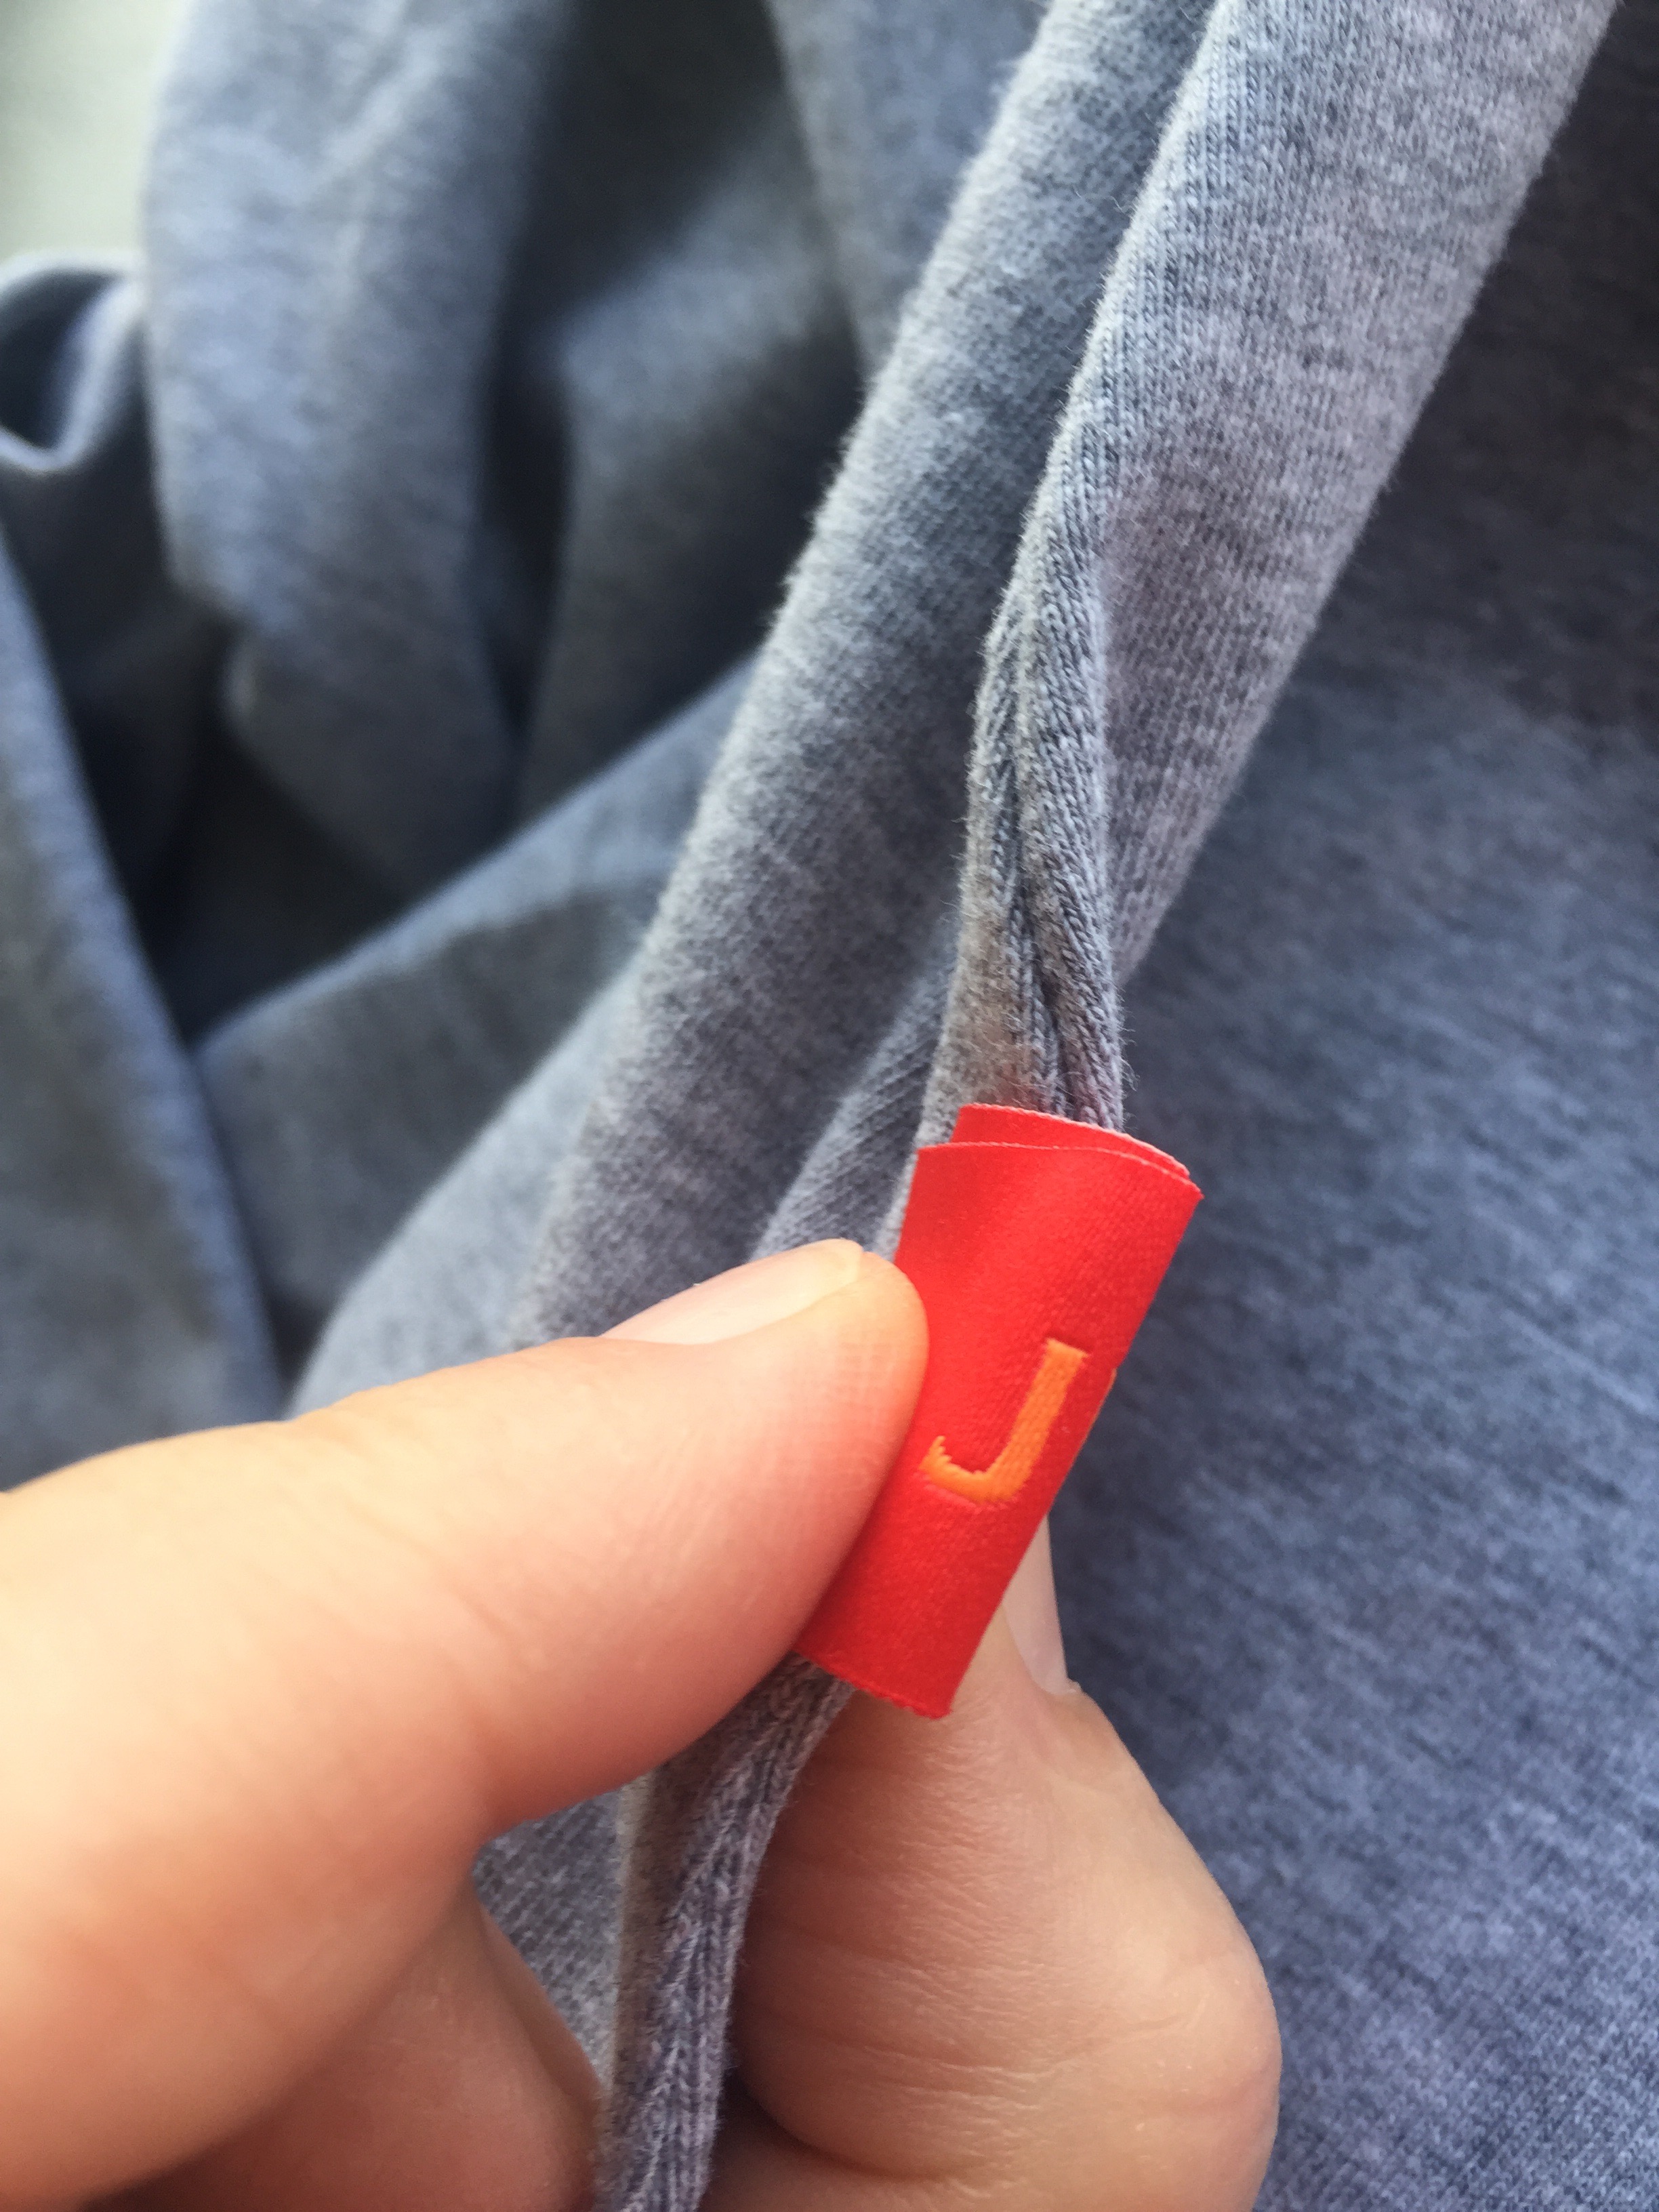
Plus I like to put one of these labels about 3″ above the left hem.

The hems on the bottom and sleeves are coverstitched .

Let me see your V necks!

Sunday morning. 

Hello anybody. It’s been a long long time since posting anything. Sewing has not been high on my list of things to do. 

Since writing, I have survived breast cancer, surgery, chemo, then radiation. Recovery takes awhile, I am back at work and trying to get my world back to normal, a new normal anyway. 

My 8 year old grandson has spent the night and he is still sleeping. I have spent the morning drinking coffee on my patio and enjoying the sunshine before the anticipated storm arrives. 


Ingredients for buttermilk waffles is awaiting the boy to awake. I recall the first time a few years ago when he watched grandma make waffles. He had a quizzical look as I didn’t go to the freezer to pull out a box of frozen waffles. He learned that day that grandma makes waffles “from scratch”. It was a term he took home with him as he was impressed grandma made things “from scratch”. It’s a funny term when you think about it. 

Today I am trying a new recipe and anxious to hear his opinion. 


He will watch me cook these up as he enjoys telling me when they are ready. He watches the steam and doesn’t want me to watch. He’ll let me know! Homemade waffles and homemade syrup too. 


I set the counter up for him, I know he doesn’t get this at home. Do you think he enjoys this? I know he does! Just for him! 

I am planning on a few more recipes today. He told me yesterday his favorite meal is spaghetti. This is new as he has been somewhat of a picky eater. 

One thing I have never made is homemade pasta. Perfect. My KitchenAide came with a pasta attachment so I plan to see how it does. 


I hope everyone enjoys their Sunday! 

Another Essential Tank by P4P

I like this tank so much. I had the super soft brushed poly fabric to make a dress with. The same pattern as the previous 2 I made except I did the regular sleeveless version. For whatever reason it was a bit snug in the hips. Maybe it was the fabric, maybe I gained weight, I’m not sure. I had enough fabric to make a shorter version but after seeing it done, I decided to turn it into a tunic length version. 

The black is such a basic, I decided to sew a coverstitch seam right down the middle of the front and the back. Looks just like a twinstitch. Makes this plain black not quite as boring. Although I never get tired of black. I used to have a whole closet full of black, beige, gray, off-white, and white. Oops, I forgot taupe. 😳. 

Here’s where you can see the the coverstitch and also the 3-inch hem. Very easy to do with the Ovation with that wide harp. 

I also shortened the shoulder seams because this fabric stretches so much and I prefer the higher front. Those are the only things I changed on the pattern. 


Hard to see black!


Can’t forget my label. 

Laundry Day Tee by Love Notions

I had just enough left over fabric for something little. I decided to make a short tee out of the 4-way stretch fabric that I had previously made into a pencil skirt. 


The Ovation was set up for cover stitching and the Evolution was set up for serging. This week I was asked if I wanted to sell my Evolution. After today’s sewing, I don’t think I could do it. Having 2 sergers is great. I just happen to have 2 that do coverstitching. A bit overboard. 

I cut the shirt as long as I could with the fabric I had. Wish I had a few more inches but I’m being thrifty I guess. 

With this super duper stretchy fabric, I stay-stitched the shirt with my regular machine. Use a regular stitch, not a stretch stitch. This will keep the shirt from stretching as you attach the neckband. 

I stitched my neckband ends with my regular sewing machine too.  See how flat the seam is? 


To put the band on, I mark the shirt and the band in 4 quarters. Starting in the middle of the back. I love this marking tool from Clover. 


Then match up the seam of the neckband to the middle of the back and attach with the little clip. Clip every marked area. 

When you hold up the shirt, you can see that the band is smaller. Should be about 80% smaller than the neck opening. Otherwise you will have a gaping neckband and it will look sloppy.

Decide what mark you are going to use which depends on how wide you want the band. I decided on this:

Keep the 3 layers of fabric even on the right side. Check it every once in awhile while you are serging to make sure the shirt is even with the band. Does that make sense? Otherwise the shirt edge that you can’t see may end up not getting stitched with the band. Not a good thing.

As you serge keep your eyeballs on that mark on the foot where that lower orange arrow is. That is how you will keep your band the exact same size. Otherwise you may have a half inch band on part of the shirt and a quarter inch on the other side. That is not a good thing either if you want your shirt to look professionally sewn. 


While you are serging, don’t look at the needles, don’t look at the blade, look at the spot on the foot. You decide on the spot and keep your eyes there. 

To put the sleeves on, I used the clips and I definitely like using them. 

I decided to coverstitch the sleeve seams and the side seams. Makes them look so nice and also makes them look good on the inside. 

This was a quick sew. I really wanted to be making another dress today but this fabric was on the cutting table and I needed to get rid of it.

Now I have a cute little shirt. 


I added this little label to the side seam. I think I’ll move it up a few inches. 

Now back to cutting out my dress….

2 dresses, 1 shirt later

Yes, I really like this pattern. The Essential Tank.  So much that I’ve made it 3 times since Saturday. Saturday was yesterday.

Wasn’t sure how the drape of fabric would work with the dress. So I experimented. It’s 95%cotton5%lycra. It was great. The first one is a Caribbean blue but it doesn’t look that way with a iPhone camera.

I did the same racerback tank version. Considering its about 100° out here I thought I could use it. I had to serge it down a bit in the hips. I loved that . 🙄

I made both between a maxi and a above the knee.

Here’s a picture of myself incognito. Notice I never post selfies. It’s a reflection selfie.

Both of these will be perfect for my weekend in Chicago next week. Plus the skirts from a couple weeks ago. It’s only a overnight trip but I’m bringing 7 outfits. A girl must have options.

The second one is gray heathered and the fabric was left over from another project and I had just enough!

Phew.

Ive been playing  with labels.


But right now I’m doing this:
Another incognito selfie…..

Essential Tank

I really think this is an essential tank. So many options too. My first trial of this pattern by  Patterns for Pirates turned out pretty much perfecto. Still searching for a summer tank dress, I decided to start with the racerback tee option and make a exercise top.

The fabric is 4-way stretch specifically for activewear. From Zenith and Quasar.

I planned to put a little tag at the back neckband. Now I’m sure I cut it too short, but I still like it.

I tucked it in between the neck band and shirt back.

And just serged it all together.

I also put a little loop down on the lower right side.


The neck and arm bands are the perfect size. 1 3/4″ with a half inch seam. I really like how that turns out. Most other patterns are wider.

I made it tight as I plan to wear it while exercising with a jog bra underneath. 

My favorite way to put a band on is to use this fancy pen. It’s a friction pen and when ironed, it disappears. Made by Pilot.

I sew the band together, turn, iron, then divide the band in quarters , and mark right on the fabric. Works better than pins that tend to fall out. Mark the shirt in quarters too. Then match up the marks. While sewing a band on, stretch the band and not the shirt!

To start serging , I like to cut into the fabric and take about an inch out. I start at the underarm in this case. 

I look at the mark at the lower arrow. The band will be the same width if you look there. Find where you want your measurement. The serged side is a half inch seam. If you don’t know, use your 6-inch gauge and measure from the needle to a mark on the machine. I use the L. My needle is in the right side. For some reason I always use the right side when I do a 3-thread overlock seam. Doesn’t really matter if you know your seam allowance is correct.


So both sides of the band are constantly the same. It’s also important to know where the bottom piece of fabric is. It has to be perfectly in line with the band or you may miss serging it all together.

After you serge the bands to the garment, it will look a mess. Something like this:

See how curly it is? Time to iron.

Then the fun part.

Coverstitching!

For the neck and arm holes, I used a narrow double coverstitch.

There’s my little loop in the back and I just coverstitched right over it.

For the side seams and shoulder seams I used the triple coverstitch.

Here’s a view from the front with the hot pink jog bra on.
img_9944
Back view: img_9948
I will be making more. ☺️

How to lock your coverstitch 

Last night I made the Love Notions LDT (LaundryDayTee) with the free  tank version. This pattern was free for quite awhile if you joined the FB page but now is at a discounted price.

After finding out I didn’t have enough fabric for a tank dress that I was planning to make, I decided to use the fabric to try the tank version of the LDT.

The fabric was a slippery bamboo knit/5% lycra, hot pink. I did the V-neck version.

I sewed the bands with a regular sewing machine so they lay nice and flat. Plus the banding instructions for the V-neck are sewn at angles in order to make a V.

Lots of coverstitching with this top, my favorite stitch.

People often ask how to secure the ends after coverstitching. It’s really pretty simple.

Here are a few tips I do when coverstitching.


This is the BabyLock coverstitch foot. I love it. When sewing, I am not looking at the needles, I am watching the spot where the arrow is pointed, just an occasional glance at the needles. I know exactly how far I want the stitch from the fold of fabric. I usually have the stitch length at 3. When coming to a area that has a lump of serged fabric underneath, I get ready to help the fabric go under the presser foot with out stitching in one place (cause of the bulk). What is so nice about the BabyLock Ovation is that I can put either hand behind the foot and guide or pull lightly so that the fabric keeps the same pace. Does that make sense?


When I get to the end of a hem or band I make sure the lines of stitching are in line with the coverstitch foot.


Then when I get to the stitches I either stop or continue for a stitch or two, then I ‘lock’ the stitch like this:

This hex screwdriver comes with the machine.


Lift the presser foot and pull the top threads towards the front of the machine.

Then clip the threadsThen pull the fabric towards the back of the machine. This in effect, locks the threads underneath.

That is how to lock your coverstitch threads !

Free Spirit Tank

This was a quick sew with my serger, otherwise  known as Miss O. I had hoped it would be a tank dress that I could wear in Chicago in a couple weeks but it’s a bit too short for me and I had no extra fabric. Unless I get creative adding length, it will be some sort of tank top.

Fabric is from Girl Charlee and has been in my stash for at least a year. My color this year is definitely pink. I want everything pink. And of course, what looks great with pink, orange. Yes, I love pink and orange. Good thing I have orange labels.


This pattern is from Patterns for Pirates. This is last years tank which I never made. They have a new one, just released, called The Essential Tank and I do think that both of these need to be in everyone’s collection of patterns. Easy makes for everyday wear.

There are just 2 pieces for the pattern, plus the neck and armhole bindings. I combined 2 sizes, grading to a larger size for the hips. 😑

I wish everyone that sews could have a serger and a coverstitch machine. My big love is topstitching and coverstitching is topstitching.

It’s a tone on tone stripe. I have no idea of the cost but it was very inexpensive. Fabric was easy to sew with.  I still want a pink dress though…

This is a pattern that I believe will be used over and over for summer wear. The pattern has several hem options and also a racer back tank option. That would be great with athletic fabric to work-out in.

That sounds like it could be my project for tomorrow.

I loved making this top with Miss O.

P4P pencil skirt

While browsing FB, I saw a post for a knit pencil skirt and it was free if you were a member of their site. Hmmm, I thought I was a member but maybe I had deleted it. So I joined again and whipped up a skirt that I have been planning in my head.

The patterns are PDF files. Last week I swore I wouldn’t buy another unless I was desperate. Tired of matching notches, folding paper, and taping 66 times. Patterns for Pirates (P4P) does it differently. The printer paper is just matched up and taped, plus they use the layers technique so that you only have to print your size or the sizes you need to make any necessary adjustments. Cool!

I had purchased fabric for a pair of leggings awhile back. Super soft, super perfect for leggings. I bought it at Zenith and Quasar. It’s a brushed polyester , 89% polyester 11% spandex. The weight is around 200 grams. 4-way stretch. This company has buy-ins where you can get good deals on a mass order but also can purchase at other times. At least that’s how I think it works.

I saw a lady on tv with a pencil skirt made of similar fabric and I knew I’d be making one soon. Last night was the night and I LOVE.

This pattern has 2 pattern pieces and a waistband with dimensions to cut. The skirt and waistband have choices of a mid-rise and a high-rise. I chose the high-rise. If you are 20, you might want the mid-rise, it’s a 2-inch difference. The pattern has 3 different length options. I chose below knee.

I cut out one size smaller in the waist and graded to the next size in the hips. (Notice I didn’t say I went ‘larger’ for the hips. It’s all a mind game)

The fit was PERFECT.

I used my serger doing a 3-thread for the side seams. Then I decided I had to use my favorite 3-thread coverstitch since this fabric is basically athletic wear. So I then coverstitched the side seams and the hem. I sew on the inside of the skirt for the triple coverstitch.

Then when you turn it over there is the fabulous stitch. Everytime I see it, I get excited.

As I said in a previous post, I like to sew my waistband with my sewing machine using a regular stretch stitch.

img_9797

Then I iron it flat.


See how flat it looks, instead of a big serger lump. You can hardly see it.

The waistband was serged on the skirt, then coverstitched. Another nice feature of this pattern was the big notch in the center back. I wondered what it was for. It’s quite large but came in handy when putting the waistband on the skirt. Often the front and back of a skirt look so much alike that they get mixed up if you don’t have it marked. This notch was my mark.

I started this skirt late in the evening and finished it fast!

I went to bed thinking that I want to make more. I had ordered some pink ponte from Girl Charlee that I didn’t really like so I thought it might be an ok summer skirt. So the first thing I did today was pre wash that ponte on the quick cycle 😍.

I cut her out quick, then serged those side seams. Since it’s a ponte it will probably look best without the triple coverstitch, so this skirt is even faster than the other.

Here is a tip on how I do waistbands with a serger. For these skirts, the seam allowance is 1/2″.

  1. Sew short ends together with sewing machine. Iron flat.
  2. Put 4 pins evenly around waistband, one in center back, center front and each side.
  3. Do the same with the skirt.
  4. Match pins.
  5. Get ready to serge.
  6. Take an area in the back near the side seam, cut about an inch long and 1/4″ deep like this: 
  7. Place under serger. 
  8. Serge around waistband stretching to fit skirt to waistband. 
  9. Then come around to the cut area. 
  10. Perfect.

Comes out like this, so iron well.


Then I did a wide coverstitch.


I love this coverstitch foot.

For the hem I had already serged the raw edges then press up 1 inch and coverstitch.

That’s it. Don’t forget your label.


Waistbands. 

In the last couple years I have changed my method for sewing waistbands. The old method has been basically following directions which usually consisted of sewing on the waistband, turning the inside seam allowances under, and top stitching. Sounds easy enough but often to get that topstitching to match perfectly on both sides was an irritating challenge. That is if you like things perfect. I think I am in that category. I have become much more free in my sewing, making my garments with my way of doing things.I don’t worry about the instructions and make it my own. Some people do this naturally. Some people drive themselves crazy by trying to follow someone else’s instructions. I used to always follow the rules. But not anymore.

This is one way to do it.

Sew the waistband lining to the waistband . Trim or grade seam. Edge stitch using #10D foot.

{Wowza, look at those matching seams}

This is where your options begin. For this post, I will be using the serger method.

The fastest way to finish your seams is to use your serger with a 3-thread overlock stitch with a short stitch length. Like a 1 or even less. The width is pretty wide. Maybe a 7.5. There are no rules. Make this your own.


Isn’t that pretty?

Then you can add your label before you attach the bottom of you want.

For this pair I stitched a tight 3-thread zig zag (#7).


You can also stitch your label on after everything is attached. Sometimes it is fun to use a contrasting thread on the outside like this:


img_9770-1img_9769-1


After attaching your label, stitch the short ends of the waistband (leave the lower edge free). Then, on the lower edge, fold it under on each end to where you think is appropriate spot. (Perhaps it could be folded under for the entire width of a front pocket, wherever it looks nice). Pin the entire waistband.

For this pair the pants, the waistband was stitched in the ditch from one end to the other. This pair has a contrasting lining. I put matching thread in the bobbin for the lining.

The inside looks like this (there is elastic inside):

I think they look great. Much better than sloppy topstitching. 😱


Perfect!